
The Ultimate Guide to AeroPress Coffee Brewing
This simple-looking device has garnered a cult following among coffee enthusiasts worldwide, and for good reason.
5/20/20254 min read
Unleash Your Inner Barista: The Ultimate Guide to AeroPress Coffee Brewing
In the world of coffee brewing, the AeroPress stands out as a champion of versatility, portability, and downright delicious results. This simple-looking device has garnered a cult following among coffee enthusiasts worldwide, and for good reason. Whether you're a seasoned coffee aficionado or just starting your exploration, this ultimate guide will equip you with everything you need to master AeroPress coffee brewing.
Forget complicated setups and lengthy brewing times. The AeroPress offers a quick, clean, and incredibly customizable brewing experience that consistently delivers smooth, rich, and grit-free coffee. Let's dive into the secrets of unlocking its full potential, right here in Germiston (and beyond!).
Why Choose the AeroPress?
Before we get into the "how," let's touch upon the "why." The AeroPress boasts several key advantages that make it a compelling choice for any coffee lover:
Versatility: Brew everything from a concentrated shot similar to espresso to a full-bodied Americano-style cup. Experiment with grind sizes, water temperatures, and brewing times to find your perfect flavor profile.
Portability: Lightweight and durable, the AeroPress is the ideal travel companion. Enjoy exceptional coffee wherever your adventures take you.
Speed: In just a couple of minutes, you can have a fantastic cup of coffee in hand. Perfect for busy mornings or a quick afternoon pick-me-up.
Cleanliness: The simple design and plunger mechanism make cleanup a breeze. Just a quick rinse, and you're done.
Smooth, Grit-Free Coffee: The included micro-filter effectively removes sediment, resulting in a clean and enjoyable brew.
Durability: Made from sturdy materials, the AeroPress is built to last.
Keywords: AeroPress, coffee brewing, AeroPress guide, how to use AeroPress, best AeroPress method, portable coffee maker, quick coffee brew, smooth coffee, grit-free coffee, AeroPress recipes
What You'll Need to Brew with an AeroPress:
Ready to get started? Here's a list of essential equipment:
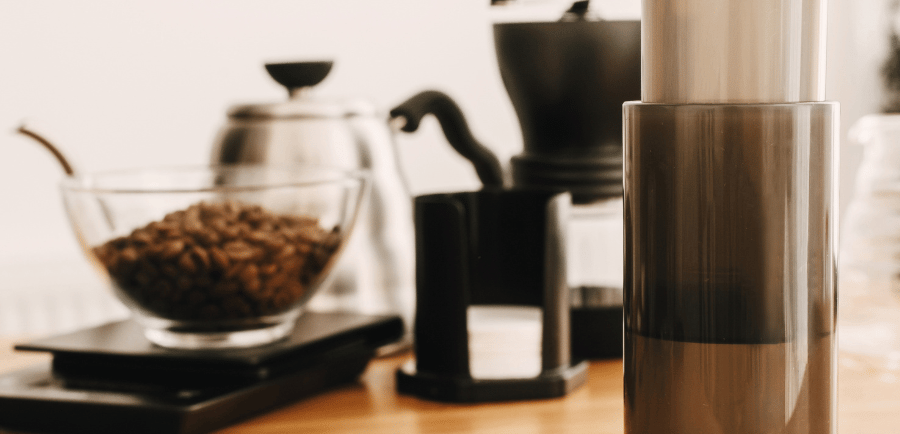
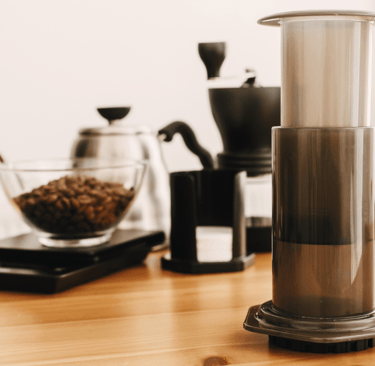
AeroPress: The star of the show, complete with its plunger, chamber, filter cap, stirrer, and scoop.
AeroPress Filters: You'll need these for every brew. Paper filters provide a clean taste, while reusable metal filters offer a different flavor profile with more oils.
Freshly Roasted Coffee Beans: The quality of your beans makes a huge difference! Opt for whole beans and grind them just before brewing for the best flavor.
Coffee Grinder: A burr grinder is highly recommended for consistent grind size, which is crucial for optimal extraction.
Kettle: To heat your water to the desired temperature.
Mug or Server: To catch your delicious brewed coffee.
Scale (Optional but Recommended): For precise measurements of coffee and water, leading to more consistent results.
Keywords: AeroPress equipment, coffee beans, coffee grinder, kettle, coffee scale, AeroPress filters, burr grinder
The Classic (Standard) AeroPress Brewing Method:
This is the most common and straightforward way to brew with your AeroPress.
Heat Your Water: Aim for a water temperature between 80-95°C (175-205°F). Slightly cooler temperatures can bring out more nuanced flavors, while hotter temperatures can lead to a bolder brew.
Grind Your Coffee: Grind your coffee to a medium-fine consistency, similar to table salt. If it's too fine, it can be hard to press; too coarse, and you'll get an under-extracted, weak brew.
Assemble the AeroPress: Place one paper filter (or your metal filter) into the filter cap and twist it onto the brewing chamber.
Add Coffee to the Chamber: Place the AeroPress chamber directly onto your mug or server. Add your ground coffee. A common ratio is 1:15 (e.g., 15 grams of coffee to 225 grams of water), but feel free to experiment. Use the included scoop as a starting point (usually around 1 tablespoon).
Add Hot Water: Pour your heated water over the coffee, ensuring all the grounds are saturated. If you're using a scale, aim for your desired water weight.
Stir: Gently stir the coffee and water mixture for about 10-15 seconds to ensure even saturation.
Insert the Plunger: Insert the plunger into the top of the chamber, creating a tight seal.
Press: Slowly and steadily press the plunger down. This should take around 20-30 seconds. Avoid excessive force. You'll hear a hissing sound as all the air is pushed out.
Enjoy Your Brew: Remove the AeroPress from your mug. You've now brewed a concentrated coffee that can be enjoyed as is (similar to a strong espresso shot) or diluted with hot water to create an Americano.
Keywords: standard AeroPress method, classic AeroPress brew, AeroPress steps, brewing coffee with AeroPress, AeroPress instructions
The Inverted AeroPress Brewing Method:
The inverted method involves assembling the AeroPress upside down, which prevents any dripping before you're ready to press. This allows for longer steep times without the worry of coffee leaking through the filter.
Heat Your Water and Grind Your Coffee: Same as the standard method.
Assemble the AeroPress (Inverted): Insert the plunger into the brewing chamber about an inch or two. Flip the AeroPress upside down so the plunger is on your work surface and the open chamber is facing upwards.
Add Coffee to the Chamber: Add your ground coffee to the chamber.
Add Hot Water: Pour your heated water over the coffee, ensuring all grounds are saturated.
Stir: Gently stir the coffee and water mixture for about 10-15 seconds.
Steep (Optional): Allow your coffee to steep for your desired time. Experiment with different steep times to influence the flavor.
Attach the Filter Cap: Carefully attach the filter cap with the filter to the brewing chamber.
Flip and Press: Quickly but carefully flip the AeroPress over your mug or server. Press the plunger down slowly and steadily, just like in the standard method.
Keywords: inverted AeroPress method, AeroPress upside down, no drip AeroPress, longer steep AeroPress, alternative AeroPress technique
Tips for Brewing the Perfect AeroPress Coffee:
Experiment with Grind Size: This is a crucial factor affecting extraction. Adjust your grind based on your taste preferences.
Control Water Temperature: Different temperatures can highlight different flavor notes in your coffee.
Play with Coffee-to-Water Ratios: Adjust the amount of coffee you use for a stronger or weaker brew.
Try Different Steep Times: Longer steep times generally lead to a more extracted and sometimes bolder flavor.
Use Freshly Roasted, Quality Beans: This is the foundation of a great cup of coffee, regardless of the brewing method.
Clean Your AeroPress Regularly: This will prevent any buildup of coffee oils and ensure optimal performance.
